Search This Blog

Monday 28 March 2011

Original rims on the car.

Changed those pimped Borbet rims... this is how she looks with the original Barock-rims on...

Also ordered the last parts for my fuel-system swap yesterday from  https://www.diyautotune.com. As soon as the "relay-board" is build, I will mount it in the motor-bay and start connecting all sensors except for the fuel-delivery parts. By doing this I can test everything for real while driving. When I'm familiar with the system it's just to replace the injectors and fuel delivery.

My girl...

Thursday 24 March 2011

Bought new fender "panels"

Since all rust now is gone from inside the front fenders I bought new panels to replace the old rusty ones.
Will not mount them until they have sprayed the car with rust protective coating...

Fender Panels

Designation PANEL,FRONT FENDER
Part number A1078840135/A1078840235
Price excl. VAT ca 43 Euro
Price incl. 25% VAT ca 53 Euro 

Sunday 20 March 2011

Reassembled the right fender today...

Made the final work today, zink-sprayed every place where there where clean metal, then sprayed rust protective coating on vulnerable places. Put body sealing in every place where the fender is attatched to the chassi. Was quite easy to put the fender and bumper in place since all that old plastic sealing now was gone... Next step is to leave it to a firm where they will spray rust stopper and rust protection everywhere where it's necassery inside and outside.


New frame

As new...

Everything sprayed.
Grinded and (zink) sprayed the lower inside of the fender, body sealing in place
body sealing behind the lower part of the fender
Body sealing between fender and chassi

Friday 18 March 2011

The right fender

My father in law have put some hours to fabricate new metal pices to replace the rusty parts and welded them in place, lots of credit to him.

I'm not suprised founding rust in these places since the drainage is really poor, I would recommend other SL owners, at least here in Sweden to drill new drainage holes in the frames/panels I have repaired.  

It feels ok to have all major rust fixed... There are some surface rust which will be removed and painted before the fender are putted in place The next step will be to leave the car to a firm who sprays rust stop and rust-protection everywhere outside and inside the car.

Some metal fabrication. hard to drill square holes, isn't it...
New piece in place
Rebuiling frame

Starting to weld it together

Almost ready, my father i law inspecting the rocker panel behind the lower chrome trim.

Painted some "body-sealing" on the welded pieces.

Next step is to spray some protective coating before putting the fender in place.

Can't resist showing the authentic Excalibur my father in law has rebuilt from scrap... It's one of the first Excaliburs ever made.
I really want this, looks like an old MB...

Thursday 17 March 2011

Today I helped my father in law when he fixed some of the rusty parts on my car's left fender.

He did the metall-work and I disassembled the interiour to prevent fire. The good part is when we check inside the rocker panel behind the lower rusty part on the first picture below( the panel where the jack goes into those tubes), there is no rust at all. And except for these rusty parts everything else looks really good so there was no need for removing this left fender.

Since there is no interest in pictures of rust, I just put up a few here so that people can see where they should look for rust before buing a SL.

I also spent 4 hours to cut and scrape away that plastic/rubber coat which was sprayed inside the right fender. It was impossible to remove the right fender until all that coating was removed since it worked like glue between the parts. Finally I got it off and you can see on the last pictures what I found...

Removed the upper rusty parts and prepeared it for welding.

Starting to rebuild the frame.

The whole frame rebuilded and painted with rust-stopper.
A new piece in place and painted.

Prepearing for the next day's adventure, the right side...
After I spent 4 hours of blood, sweet and tears to get the fender off.
Everything else looks really fresh...

Rust in the same places as on the left side except for the upper rusty part...
removed the coating before grinding...
The rusty part removed...
No rust inside the "frame", and I'm very happy for that..

Monday 14 March 2011

This isn't what I wanted to find... Rust....

Changed to my new(old) Barock-rims today and guess what I found... RUST
Crawled in under the car and knocked everywhere with my hammer and didn't found any rust until I looked inside my left front fender, the good news is that it seems to be the only place...
Well hidden behind the stiff rust protection coat I managed to knock a whole and after that i just growed...


Lets see what my father in law says about this, because he promised to fix the rust if I had any on my car... and I have promised to help him paint his house as a return favor... Think I prefer painting...

Saturday 12 March 2011

Mounting the TPS (Throttle Position Sensor) used by MeqaSquirt...

The MegaSquirt® controller uses the throttle position sensor (TPS) to determine for example... when the engine is at or near full throttle (to shut off feedback from the O2 sensor), when the engine throttle is opening or closing rapidly and needing an accel/decel enrichment.

Usually the TPS is mounted on the "butterfly" valve's shaft directly on the throttle house but since I didn't want to buy a new throttle house I decided to mount it some where on the linkage to the throttle instead.

It did take some fabrication and I'm not sure yet if it's a good construction or not since the cords from the TPS will move everythime I hit the gaspedal and the linkage moves. It's not really a big problem since I will mainly use the MAP sensor which measures the absolute pressure in the intake manifold, for all  calculations in MegaSquirt. So time will tell, I can always buy an other throttle house with a TPS mounted on it... 

This is what I have done so far...  I visited the nearest scrapyard and bought a TPS .

Bosch 0280122001
Used on many car models (e.g Volvo 850)

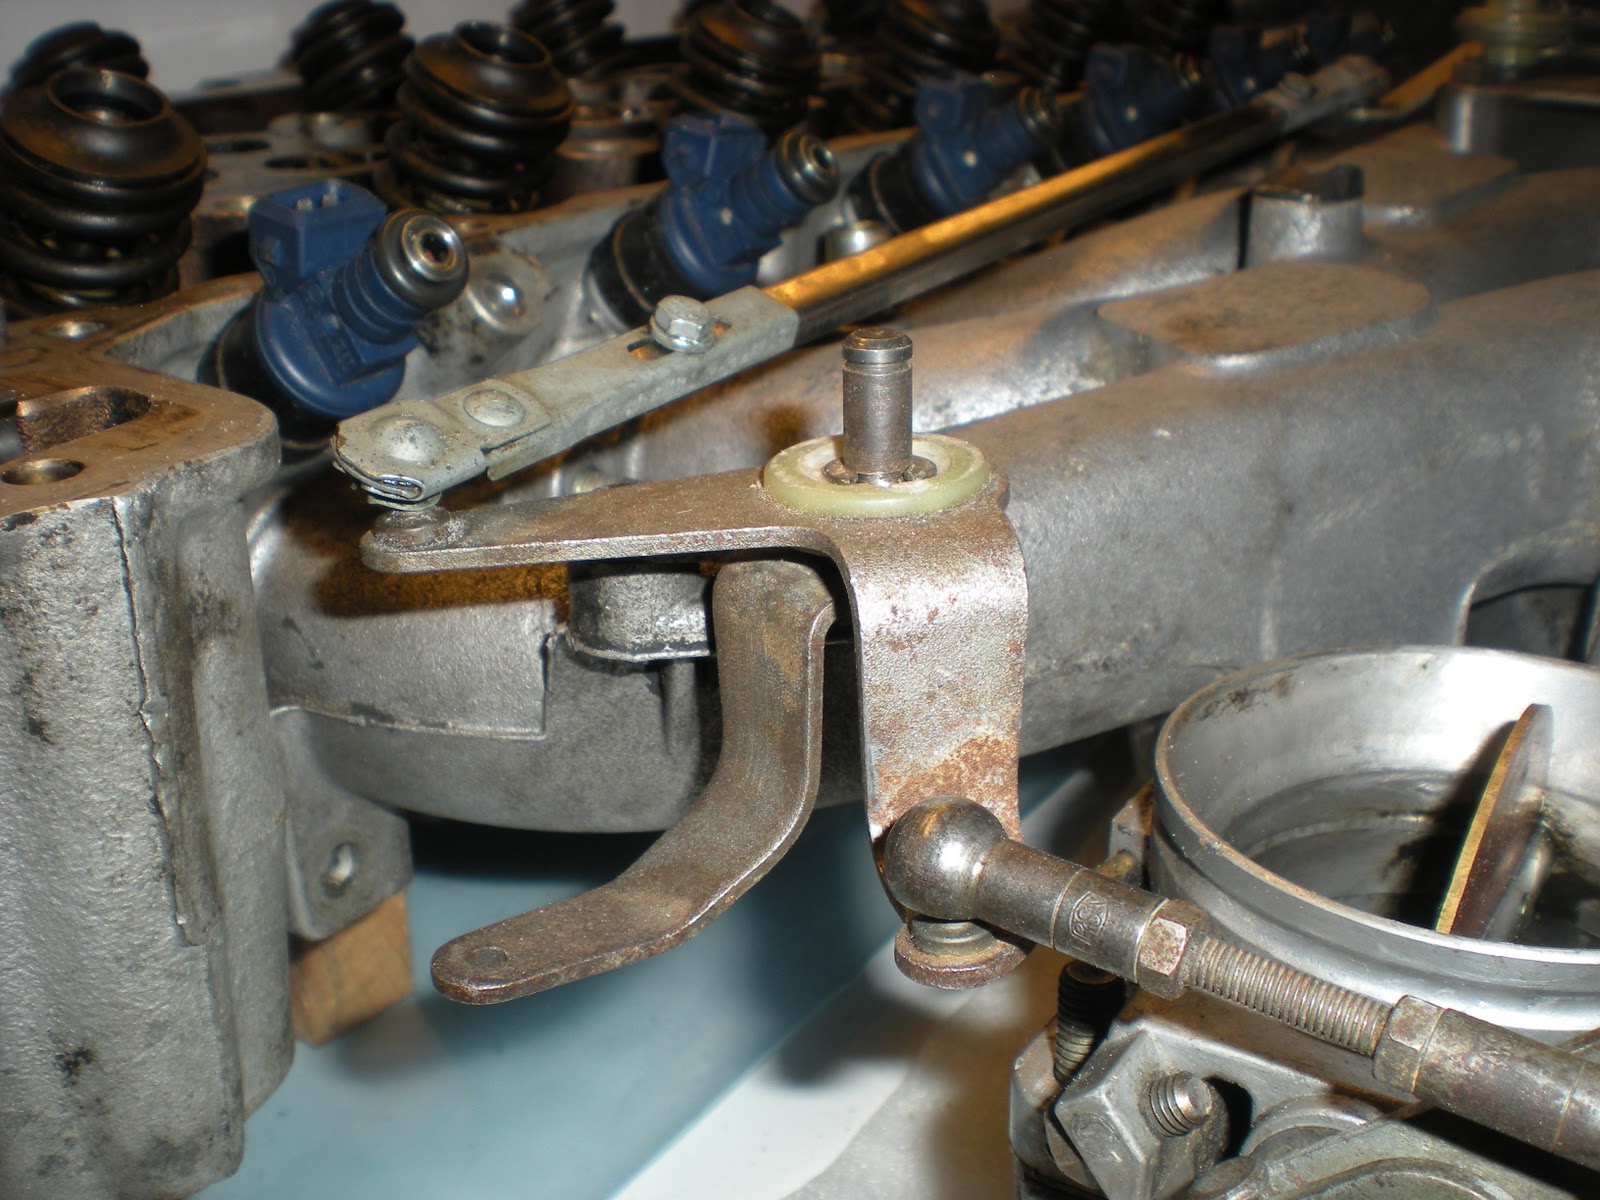
Since I couldn't mount it on the throttle house I had to find an other place which rotated 90 degrees, the same as the throttle valve. As shown here. there is a linkage which moves around a fixed shaft which I will use.

Linkage where I will mount the TPS

Before I could mount the TPS on the linkage I had to make some fabrication. I started to grind down the plastic bushing, by doing this the shaft is exposed so it can be used by the TPS. It was also necassery to cut a new "track" for the locking clip which holds the linkage in place, I used a "Dremel" tool and a smal cutting disc to do this.
original plastic bushing...

After grinding down the bushing and cut a "track" in the shaft.
The linkage in place and notice the new position of the locking clip.

To be able to fit the TPS on the shaft I had to grind down a "half moon" shaped piece from the shaft and put a screw there to keep the TPS in place.

Ready to mount the TPS

TPS mounted

Final test of the whole TPS project...
I connected 5v and mesured at WOT (Wide Open Throttle) and when it's closed, you alse see that the TPS moves instead of the shaft it's mounted on. Fortunately, the TPS did not reach any of it's end positions since the linkage didn't really move 90 degrees.
The accuracy is enough since I will set both end positions in MegaSquirt's tuning program.  

Thursday 10 March 2011

Schematic over all sensors used by the Megasquirt fuel system

A picture describing all parts involved in my fuel system swap. As you can see it can be trigged by either a ordinary ignition coil or from a trigger wheel which also can be used to control the ignition...


Standard connections using ignition coil
 
Instead of using the output to the idle valve/motor in the upper left corner I can control my electrical cooling fan from it, both temp. and hysteres can be set.

Wednesday 9 March 2011

Got some parts over...

My car got the motor replaced on warranty a couple of years after 1985, what we have found in the papers they replaced it with a M110.989 which was usually used in the W116 models (propably the only model still using M110 at that time). Due to this a cruise control actuator was mounted right below the throttle. 


Since I have to much spare time (don't tell my wife), I decided to remove it since it doesn't belong on my car, after many hours of blood sweat and tears I finally got it of the car... This is what it looks like...


Got my injectors back today...

Due to my plan to replace the mechanical injection system with an modern elecrical one I've started to get new injectors, and to be able to replace the original mechanical injectors I need to modify the new electrical ones...

I've turned down a "standard Bosch injector" (0280 150 792) to exactly the same diameter as the stock plastic injector holder. In that way both the stock injector and the new one are identical in size and will use the same seal (o-ring) as original. I also had some spacers made which places the seal in the same position as on the stock one. I will probably use 2 o-rings on each injector just to be safe, I don't want any leakage.

Stock injector... The turned one without seal and spacer and then the new modified one.


Se how nice the new injectors fit, notice the spacer which put the seal in a correct place.
All injectors in place, ready to measure for the fuel rail.
Injectors without intake manifold.
Injectors with intake manifold.

Sunday 6 March 2011

Mounting an electrical fan...

This picture shows the new electrical fan mounted on the cooler.

Here you can see the waterpump pulley where the old fan was mounted.
 
I've put an adapter with a termo switch on the lower cooling hose which grounds a relay at about 94 deg. C.
The relay then starts the fan, it must be connected via a relay since the fan uses about 15A and it WILL burn the termo switch if its directly connected to it.

This is a top and intake manifold from a spare motor I've bought. The main reason for this is that I'm going to replace the original mechanical fuel system (Bosch K-jet) with a new modern electrical fuel injection system (MegaSquirt). 
Since almost all parts have to be replaced, I need an extra "intake/fuel injection system to laborate on. By doing this I get a more enviroment friendly motor which also takes advantage of all new motor technology known today...

It is also importent that I can put everything back into original shape, therefor I need a second intake to rebuild and use as a template...


Pictures of my car...

I have created this blog to document everything I do and planning to do with my Mercedes 280 SL -85.

This is what she looked like when I just brought her home from Germany, still having German license plates...


The first thing I have done is to get 5 original rims (the fifth is the spare tire).


I haven't decided yet if I shall keep those mounted on the car in the picture or change to the original rims. It would look nice with those original MB-rims on but I propably have to by new tires before I put them on since the old tires they are old and worn. Time will tell if it will be "Borbet A" rims or "MB Barock" rims this summer...

I've also replaced the fan mounted on the water pump with an electrical one. 
The reason for this is...
  1. The motor doesn't need to drive the fan all the time instead, the fan only starts when the motor is warm enough which saves some petrol.
  2. The car gets a little more quiet.
  3. Gives some more horse power since the motor doesnt have to drive the fan all the time, have heard numbers like 3-5 hp.

Some more pictures... enjoy...